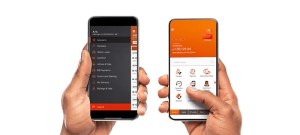
How to fund your wallet on GTBank mobile app has been a big problem for so many people, but all of that is over now. Using the GTBank mobile app to fund your wallet has various benefits for you. It first facilitates quicker and easier transactions.
You can pay for services like airtime, data, bills, and even online shopping fast and easily by funding your wallet and avoiding the need to repeatedly enter your credit card information. Because the money is already in your wallet and available for use anytime you need it, this saves you time and effort.
You also have more control over what you spend when you have money in your wallet. You can better manage your budget by allocating a certain amount in the wallet for particular expenses.
The fact that you will only use the money you have already put into the wallet makes it an excellent strategy to prevent overspending.
Also, you can fund your wallet and make payments at any time, even outside of usual business hours, as the service is available at all times.
GTBank customers can effortlessly make use of this service by using the mobile app. Anyone can profit from it as an individual or as a business owner.
For example, you can easily use it to pay utility bills or purchase airtime if you’re managing your own expenses.
If you use your wallet for business, you can rapidly make payments without having to use your primary bank account every time.
Managing your payments is made simple, convenient, and secure when you fund your wallet with the GTBank mobile app.
This service offers a versatile and effective solution that meets your demands, whether you’re attempting to streamline your business payments or looking for personal convenience.
How to Fund Your Wallet on GTBank Mobile App
Step 1: Log in to Your GTBank Mobile App
First, you need to log in to your GTBank mobile app. If you already have the app installed on your phone:
- Open the app from your home screen.
- Enter your User ID or Phone Number.
- Input your Password or use Biometric Authentication (like fingerprint or face ID) if you’ve enabled it.
- Tap the Login button.
Once you’re logged in, you’ll be taken to the main dashboard where you can access different banking features.
Step 2: Navigate to the Payments Section
After successfully logging in, the next step is to find the option that allows you to fund your wallet. Here’s what to do:
- On the dashboard, look for the Menu icon at the top or bottom of the screen, depending on your device.
- Tap the Menu icon to display a list of options.
- Scroll down and select the Payments or Wallet option. In some app versions, the wallet feature may be listed directly under the services tab.
Step 3: Select Fund Wallet
Once you are in the Payments or Wallet section, you will find different options for adding money to your wallet. Follow these steps:
- Tap on Fund Wallet from the list of options.
- This will open up a new page where you can enter the details for the fund transfer.
Step 4: Choose the Funding Source
Next, you need to choose which account will be used to fund your wallet. If you have more than one GTBank account linked to your mobile app:
- You’ll be shown a list of all your available accounts.
- Select the account you want to fund your wallet from by tapping on it.
Make sure you have sufficient funds in the selected account to avoid any failed transactions.
Step 5: Enter the Amount to Fund
Once you’ve selected the funding source, the next step is to specify how much money you want to add to your wallet. Here’s how to do it:
- Use the keypad to enter the amount you want to fund.
- Double-check that the amount is correct before proceeding.
For example, if you want to add ₦2,000 to your wallet, simply type 2000 into the amount field.
Step 6: Review Your Transaction
After entering the amount, the app will show you a summary of your transaction. The details include:
- The source account (the account you’re transferring from).
- The amount you’re funding.
- Any applicable transaction fees.
Take a moment to review this information. If everything looks correct, you can proceed. If something is wrong, you can go back and make any necessary changes.
Step 7: Authenticate the Transaction
Now it’s time to authorize the fund transfer. GTBank provides several options for authenticating your transaction:
- PIN Code: Enter your 4-digit transaction PIN to authorize the payment.
- OTP (One-Time Password): If you have this option enabled, you will receive an OTP via SMS or email. Enter the OTP into the app.
- Fingerprint or Face ID: If biometric authentication is set up, use your fingerprint or face ID to confirm the transfer.
Once you’ve entered the required authentication method, tap on Submit or Proceed to complete the transaction.
Step 8: Wait for Confirmation
After authenticating the transaction, the app will process the fund transfer. This may take a few seconds. Once the transfer is successful:
- You’ll see a confirmation message on your screen, stating that your wallet has been funded.
- You might also receive an SMS or email notification from GTBank confirming the successful transfer.
If the transfer fails for any reason, an error message will appear, and no funds will be deducted from your account. In such cases, you can try again or check your network connection before reattempting the transaction.
Step 9: Check Your Wallet Balance
Once the fund transfer is successful, it’s always a good idea to check your wallet balance to ensure the funds have been added. To do this:
- Go back to the Wallet section in the app.
- Check your current wallet balance, which should reflect the recently added funds.
If the funds do not appear in your wallet immediately, give it a few minutes and check again, as there might be a slight delay.
Step 10: Save Your Receipt (Optional)
If you want to keep a record of the transaction, you can choose to save or share a receipt. Most GTBank app versions provide the option to save a receipt at the end of a successful transaction.
- Tap the Save Receipt button displayed on the confirmation page.
- You can choose to download it to your phone or share it via email or other messaging platforms.
Saving the receipt is optional but can be useful for tracking your transactions.
FAQs
Can I use my GTBank mobile app to fund wallets from different providers?
Yes, you can use the GTBank mobile app to fund wallets from a variety of providers, including OPay, Paga, and other compatible platforms.
Is there a maximum amount I can transfer to a wallet each day?
GTBank indeed places daily transfer caps on many account types. By contacting customer support or using the app, you can verify your limits.
Does using the GTBank mobile app to fund a wallet incur any charges?
Standard transfer costs are normally charged by GTBank and can change depending on the amount and wallet provider. Before completing the transaction, be careful to check the fees.
To Register Or Login On SubBase Register OR Click here to Login
Discover more from SubBase
Subscribe to get the latest posts sent to your email.


